
Image Source: Pexels
Step 1: Choosing the Perfect Flowers
When selecting flowers, it’s all about understanding how they work together. Think of a bouquet like a conversation, each flower has something to say, and they need to complement each other for harmony.- Focal Flowers: These are your statement blooms, think large, eye-catching flowers like roses, lilies, or orchids. They’re the stars of your bouquet, so make sure they stand out.
- Filler Flowers: These flowers, like baby's breath or chamomile, provide texture and volume without stealing the spotlight. They fill in the gaps and create a balanced, natural look.
- Greenery: Fresh greenery adds structure and shape, not just filling, but also helping the arrangement breathe. Try eucalyptus, ferns, or palm leaves for a beautiful, modern vibe.
Pro Tip: Professional florists often suggest selecting flowers in odd numbers - 3, 5, 7, etc. It’s believed that odd-numbered groupings look more natural and balanced than even-numbered ones.
So, don’t worry if you end up with one extra bloom, it’s all part of the charm!
Image Source: Pexels
Step 2: Preparing Your Flowers
It might sound simple, but how you prepare your flowers sets the foundation for a successful bouquet. A professional florist’s trick is always to treat each flower with care.- Trim the Stems: Cut each flower stem at a 45-degree angle (this is the classic “florist’s angle”). Why? This maximizes the surface area for water absorption, keeping your blooms fresher for longer.
- Remove Excess Leaves: Any leaves that would sit below the waterline in a vase should be removed. These leaves can rot and contaminate the water, shortening the life of your bouquet.
- Hydrate: If you’re working with cut flowers that have been out of water for a while, give them a drink for an hour before you start arranging. It helps revive the flowers and ensures they’re at their best for your bouquet.
Fun Fact: Many professional florists suggest placing flower stems in warm water for about 30 minutes before arranging. This helps open up the blooms, making them look fuller and more vibrant when you start arranging.

Image Source: Pexels
Also Read: 2026 Flower Trends: What’s Hot in Bouquets & Arrangements
Step 3: Creating Your Floral Arrangement
Here’s where the magic happens! Crafting a bouquet isn’t about precision, it’s about balance and creating a flow.- Start with Your Focal Flowers: Place your largest, most prominent flowers in the center of your bouquet. These are your visual anchors and set the tone for the entire arrangement.
- Layering Technique: Slowly build out from the center, layering in filler flowers and greenery. The key is lightly overlapping the blooms, creating a natural, organic shape.
- Turn as You Go: A florist’s secret to achieving an even arrangement is turning the bouquet as you work. Don’t just arrange it from one angle, rotate it as you go along to ensure the flowers are balanced on all sides.
Pro Tip: A great technique is to hold your bouquet up to eye level as you work. This gives you a better sense of the balance and shape of your arrangement, ensuring that it's pleasing to the eye from all angles.

Image Source: Pexels
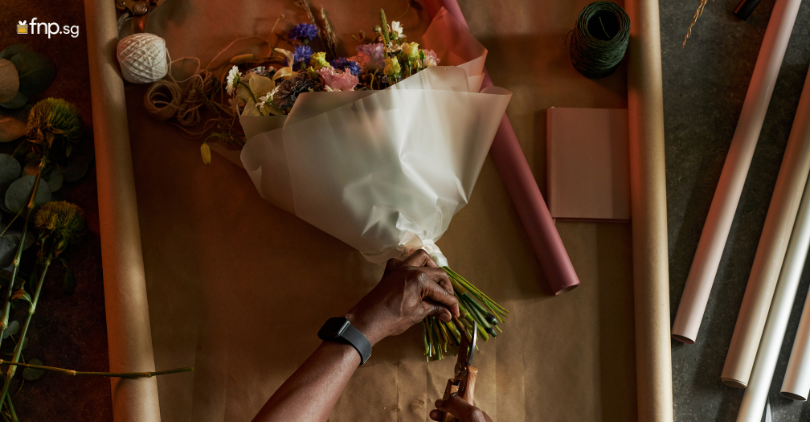
Step 4: Wrapping the Bouquet
This is where you can really show off your style! Wrapping a bouquet might seem straightforward, but there’s finesse involved, think of it as dressing up the bouquet.- Choose Your Wrapping Material: You’ll need something sturdy like kraft paper, floral tissue, or burlap. Florists often pick the wrapping based on the mood they want to create, rustic for a casual feel, or sleek paper for something more modern.
- Wrap the Stems: Start by gathering the stems and gently wrapping them in your chosen material. It should be snug but not too tight, think of it like hugging the flowers, not strangling them.
- Secure with Ribbon or Twine: Florists love using twine or satin ribbon for an elegant finish. Wrap the material around the stems, tie it in a knot, or bow it for a beautiful, polished touch.
Pro Tip: When wrapping, leave the bottom stems exposed. This gives your bouquet a fresh look and allows the flowers to get proper hydration when placed in water.

Image Source: Pexels
Step 5: Adding the Finishing Touches
The little details make all the difference. As a florist would tell you, it’s the small things that take the bouquet from good to professional-looking.- Personalised Card: A handwritten note is always a sweet and thoughtful addition.
- Add Decorative Extras: Sprigs of rosemary or lavender not only add scent but elevate the bouquet’s look. A pretty bow also adds elegance.
Fun Fact: If you're working with delicate flowers like tulips or orchids, consider wrapping them loosely, allowing them room to open up in transit. Florists do this to avoid crushing the blooms.

Image Source: Pexels
Also Read: How to Choose Between Fresh, Dried and Preserved Flowers for Every Occasion
Step 6: Where to Buy Flowers in Singapore
Finding the right flowers is key to crafting a stunning bouquet. In Singapore, you have plenty of options:- Wholesale Flowers: Head over to the Singapore Flower Market for fresh, bulk flowers at a good price.
- Florists: You can find fresh blooms online on FNP.sg or in-store, with great variety.


